In this post, I’ll take a look at some of the characteristics of segments, how to apply them, and how to create your own custom segments.
A Brief Overview
Segments are one of Google Analytics’ most powerful features. With a segment, you can analyze a subset of data.
A key use of segments is to gain insight into audience behavior.
For instance, suppose the bounce rate for the homepage is 35%. Users log in on the homepage. When you set up a segment to remove the users who go straight from the homepage to log in, the bounce rate is 90%. The bounce rate went from looking good to looking like a problem.
Without segments, the high bounce rate would be hidden.
Segments can be used to drive insights into audience behavior that would otherwise be overlooked.
Segment Characteristics
Segments can be applied across many Google Analytics reports. You can apply up to four segments at a time.
Google Analytics includes ready-to-use segments. You can also create your own segments.
Segments are flexible, non-destructive, shareable and can be applied historically.
When you apply a segment, you are temporarily examining a subset of the data. You can easily remove the segment and return to the original data set. In other words, you’re not permanently changing the data.
You can also view historical data using a segment, so you’re not limited by when you created the segment.
Finally, as long as you have sufficient permissions you can share the segments you create. Likewise, others can share segments with you.
Sampling
In some cases your data will be sampled when you apply segments. When your reports are sampled, you’ll see a golden shield next to the report name:

If you click on the shield, it will display a message like this one:
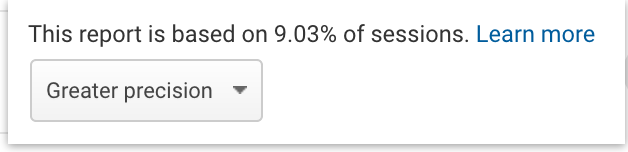
Sampling can effect the accuracy of your reports.
To learn more about sampling, a good place to start is this Google Support article and Bounteous.
Create a Clear Question
Before applying a segment, think carefully about what you want to know and why.
Suppose you want to know more about how product pages impact behavior. A few examples of how to approach that segment:
- Sessions that include a product page pageview
- Sessions that start on a product page, ie a product page is the landing page
- Users who visited a product page (the product page pageview is not tied to a specific session)
These are 3 distinctly different questions that will give you very different data. The correct segment depends on what question you want to answer.
This level of subtlety both contributes to the power of segments and is also what makes them so difficult, especially for new users. Without a clear idea of the question you’re asking, it is easy to incorrectly construct a segment and misinterpret the data.
How to Apply Segments
Up to 4 segments can be applied in Google Analytics. Segments remain active as you go through Google Analytics reports until you remove them.
Adding a segment is very straightforward:
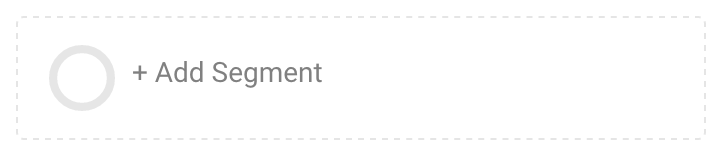
- Access segments from the top of most reports in Google Analytics:

2. Click on “+ Add Segment” to pull up a list of segments:
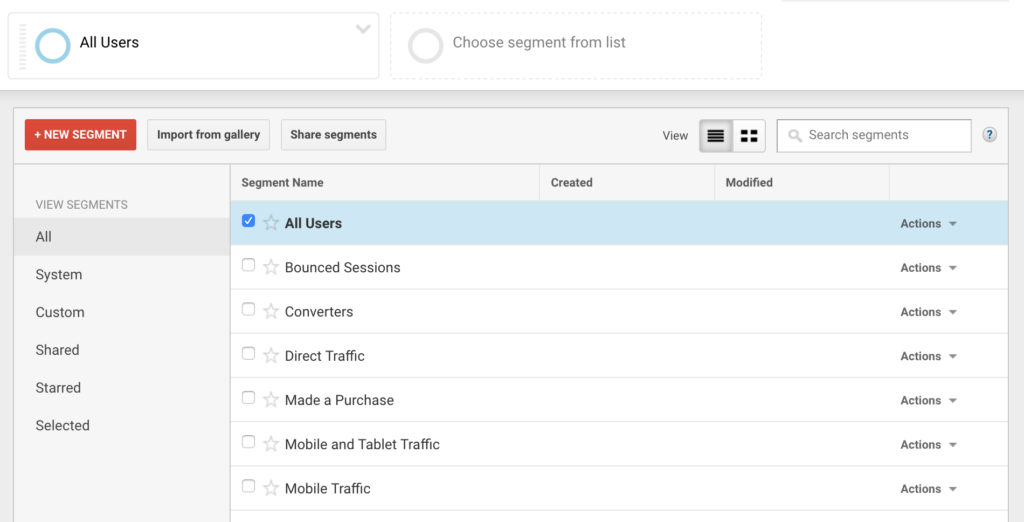
3. A list of segments will appear. On the left hand side there is a menu:
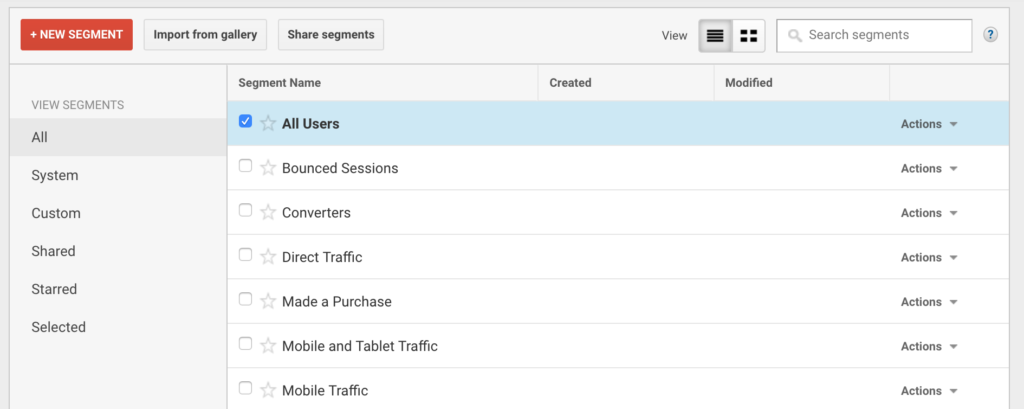
The segment menu groups the segments to make it easier to find what you’re interested in:
- All: A complete list of all the segments
- System: Built in Google Analytics segments
- Custom: Segments you’ve built
- Shared: Segments other users have shared with you
- Starred: Segments you have starred. (There is a star next to each segment name. If you click this, it will turn gold and be added to your Starred list.)
- Selected: Segments that are currently applied to your reports
4. Select the segment, scroll down and click on “Apply”:
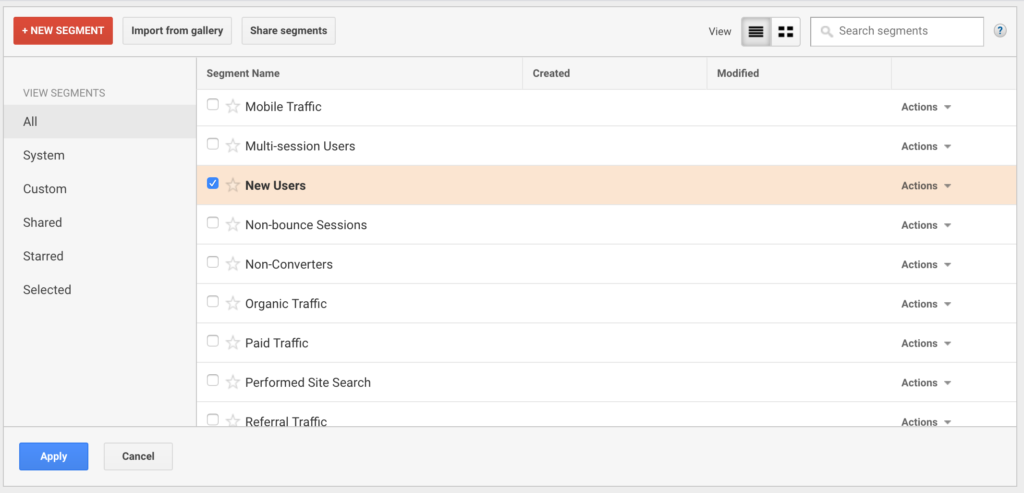
The segment you selected will appear on your reports.
How to Create Segments
You can create segments from scratch or by modifying an existing segment. I’ll walk through a couple examples on how to do this.
From Scratch
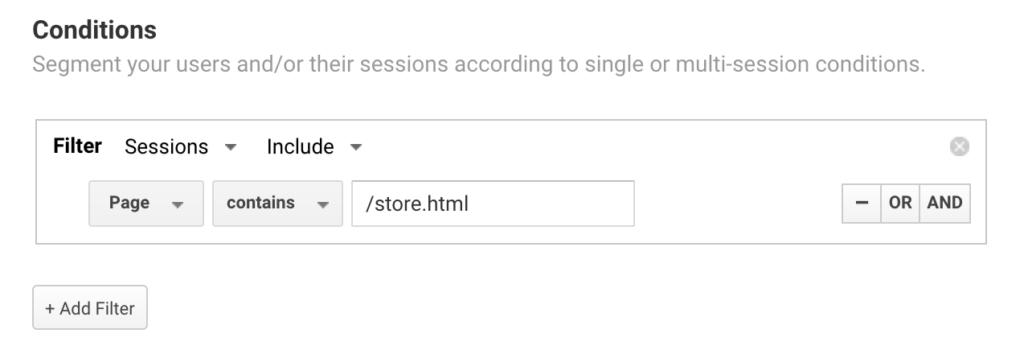
Suppose we want to look at sessions that included a view of the page: /store.html.
Another way of saying that is we want a segment with the characteristics of: Sessions that Include the Page that contains /store.html
- Access the segments from the top of a Google Analytics report:

2. Click on the red + NEW SEGMENT button in the top left hand corner:

3. Name the segment:

4. Go to Advanced -> Conditions:
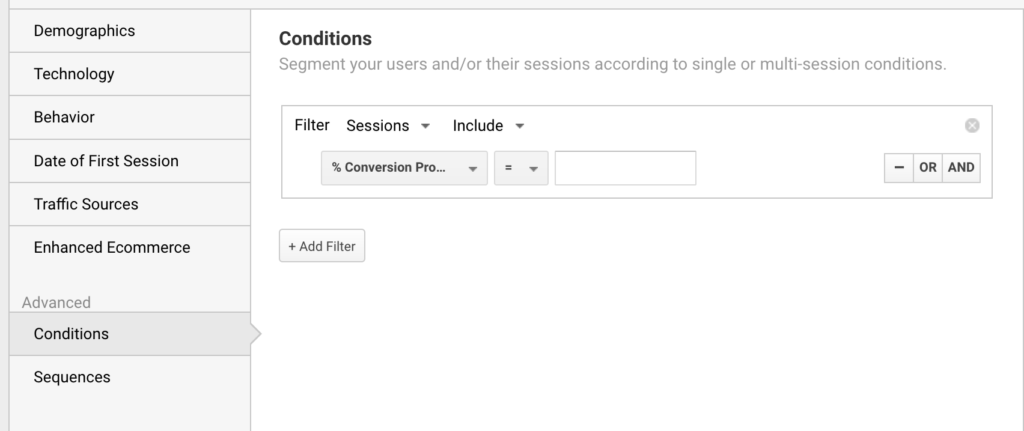
5. In this case, we want an include filter that is at the session level. Choose Page, then “contains” for the match type, and enter /store.html into the field:
6. Click on “Change” in the upper right hand corner and check that the segment visibility is correct:
When you click on Change, depending on your permission level, you will see a set of options like this:
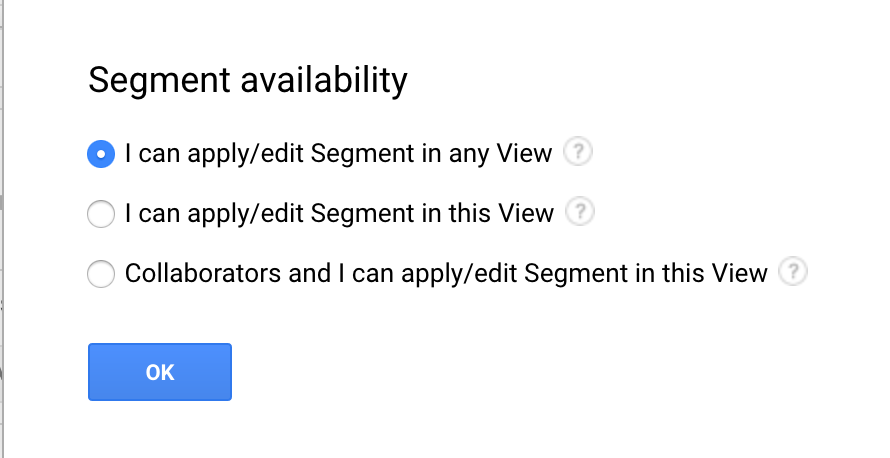
This step is important if you are working across multiple accounts and views. Choosing the right visibility helps keep your segments organized and also controls who you share them with.
8. Click on “Save” next to the segment’s name:

The segment will be saved and applied to the view.
Copying and Modifying an Existing Segment
A handy feature of segments is that you can copy and modify an existing segment. This is an amazingly useful short cut. Built-in segments, segments you created, and segments that have been shared with you can all be duplicated and modified.
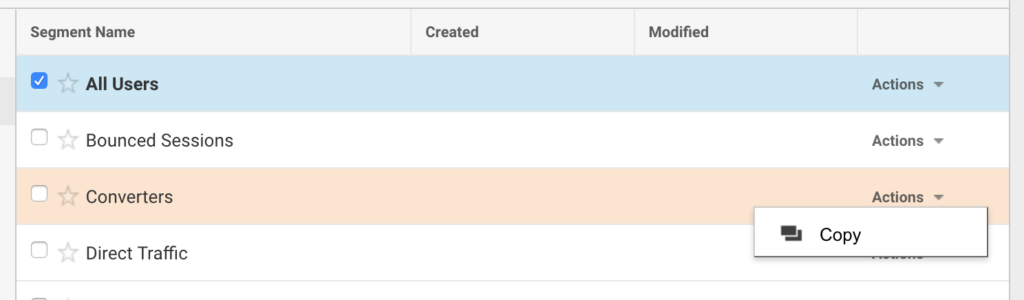
- To duplicate a segment, click on “+ Add Segment” at the top of a report to pull up the list of segments:
2. Click on “Actions” next to the segment you’re interested in and click Copy:
3. Rename the Segment and update the parameters. In this case I updated the parameters to include United States:
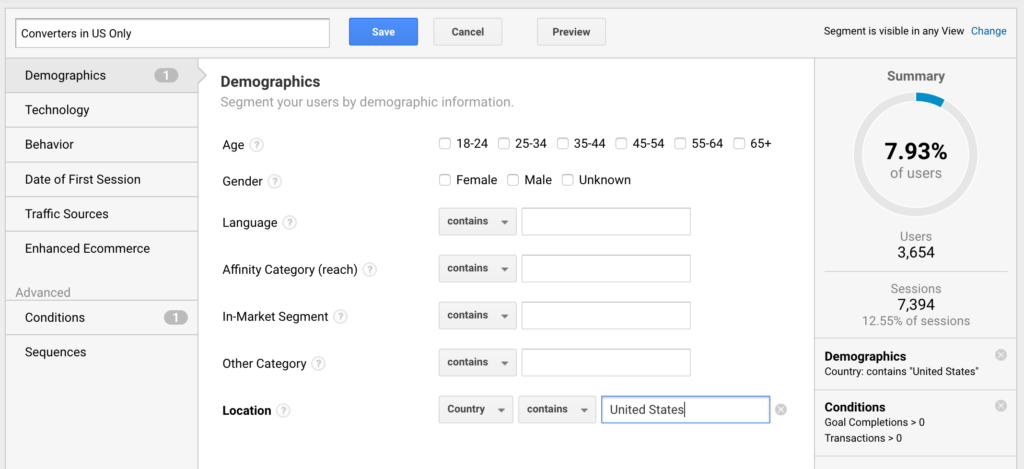
4. As before, check the visibility. Then click on Save at the top of the page.
The segment will be saved and applied to the view.
Conclusion
Segments are very powerful and can be used to drive insights into audience behavior that would otherwise be hidden. In later posts, I’ll write more about segments and their applications.